Update Oct 4, 2022 – A new post is published with the newest pairing info. See here: https://lazymocha.com/blog/2022/10/04/samsung-smartthings-groovy-to-edge-conversion-and-xiaomi-aqara-devices/
Following on Part 3, the idea of “Smart Home” is to be able to get updated information from the home; sensors are the eyes and ears that tells you everything from temperature, occupancy, door/windows opening, garage door status and more.
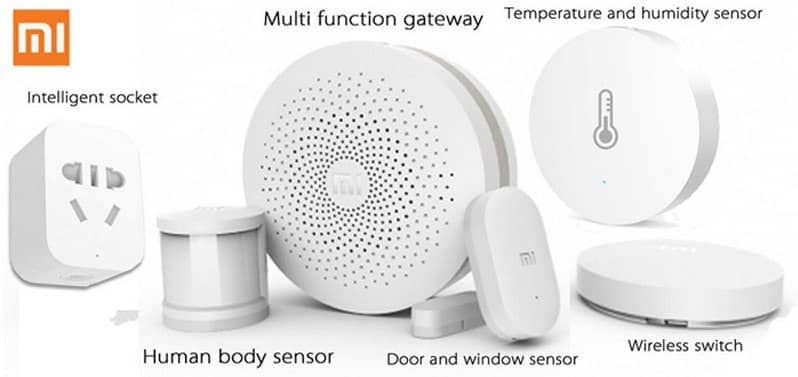
Unfortunately, sensors are not cheap, it should also be part of the budget for building a smart home. Xiaomi, a Chinese conglomerate of all things electronics have their own inexpensive smart home solution. I am going to walk through the process of modifying Xiaomi “MiJia” sensors into SmartThings. Xiaomi “MiJia” smart home system uses Zigbee standard, but Xiaomi has pre-programmed the devices to work with their own ecosystem. The community in SmartThings is able to make these very inexpensive and small sensors to work with SmartThings.
All but the Multi-Function Gateway can be added to SmartThings, the gateway is a hub on its own therefore it is not programmable to SmartThings.
In order to add these Xiaomi devices to SmartThings, we will need to have have the sensors very close to the hub and have access to the IDE. We will be using the “catch-all” method to locate the Zigbee ID.
-
- We need to add all the Xiaomi device handlers (DTH) we need from https://github.com/a4refillpad/Xiaomi/tree/master/devicetypes/a4refillpad
- Open the Event logging feature in the IDE: to ensure we are logged onto the correct Samsung server, click on My Locations, click on the Name of the hub and click Events.
- On the SmartThings mobile app, go to My Home > Things -> Add a Thing
- Use a paper clip to insert into the reset hole at the bottom of the device, press and hold onto it until the LED blinks. This will put the sensor in pairing mode.

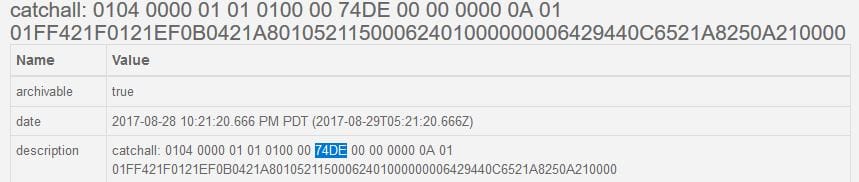
- Refresh the Event page over at the IDE, click an display “all” at the top. Look for Hub under the source category, there will be a “catchall” event follow by a long string of hexadecimal characters. We are going to be paying attention to the 19th -22th characters as that is the sensor’s Zigbee ID.

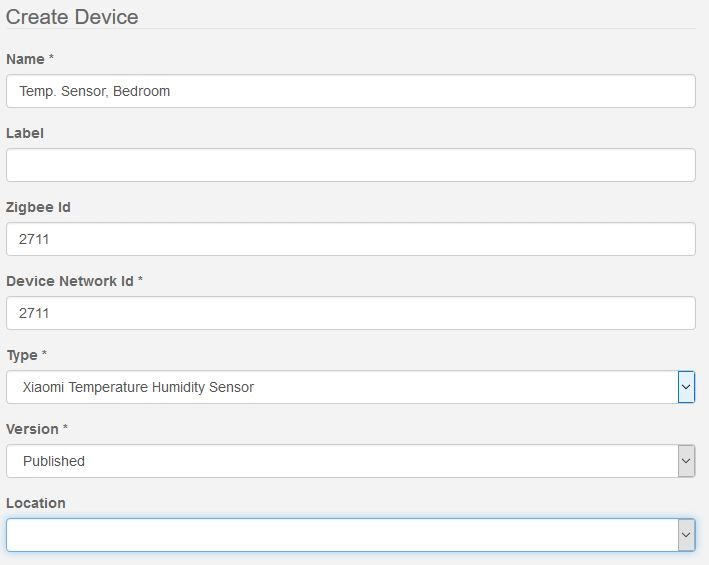
- At the IDE, click “My devices” from the top and then “+ New devices”, enter the Network ID and Zigbee ID as highlighted below. *IMPORTANT* Ensure under “Type”, the correct device is selected (ie. Xiaomi Temperature Humidity Sensory) and click Create.
- We can cancel the Add A Thing function at the app as now the sensor will be added to the hub.
- Repeat the procedures to other XiaoMi sensors
If the sensor stops reporting and battery replacement is required, we will have to re-program the sensors again as a new Zigbee ID will be regenerated.